Skip to content

Home / Docs / Website Chat / Install the Website Chat widget

Install the Website Chat widget

This guide switches Website Chat on, puts the widget on your site, and checks it works. You do not need the Twilio Console or the Telnyx portal for any of it. You still connect Twilio or Telnyx in TelBuddy for your numbers, texting and calls the usual way.

Overview: Website Chat docs ยท Sales page: Website Chat

Before you start

  1. You can sign in to TelBuddy as an admin.
  2. You have connected Twilio or Telnyx and synced at least one number (connect Twilio, connect Telnyx). The widget's Call and Text buttons use it.
  3. You can edit your website enough to paste a script before </body> (a theme footer, a "custom code" box, or the HTML itself).
  4. If the AI will answer chats, train your knowledge base first.

Step 1: Switch chat on

Open System Manager, then the Widgets tab. Under 3 Website chat, switch Chat with visitors on.

Then choose:

  • Who answers: Automatic, Teammates only, AI first, or Contact form only. See who answers.
  • If nobody replies within: 1, 2, 3 or 5 minutes. See when nobody answers.
  • Look and feel: whether the bubble opens a menu or the chat, a title, a color and a logo.
  • Contact form: whether visitors must give a phone number, an email, either or both.

Press Save changes at the bottom. The preview on the right shows your choices as you make them.
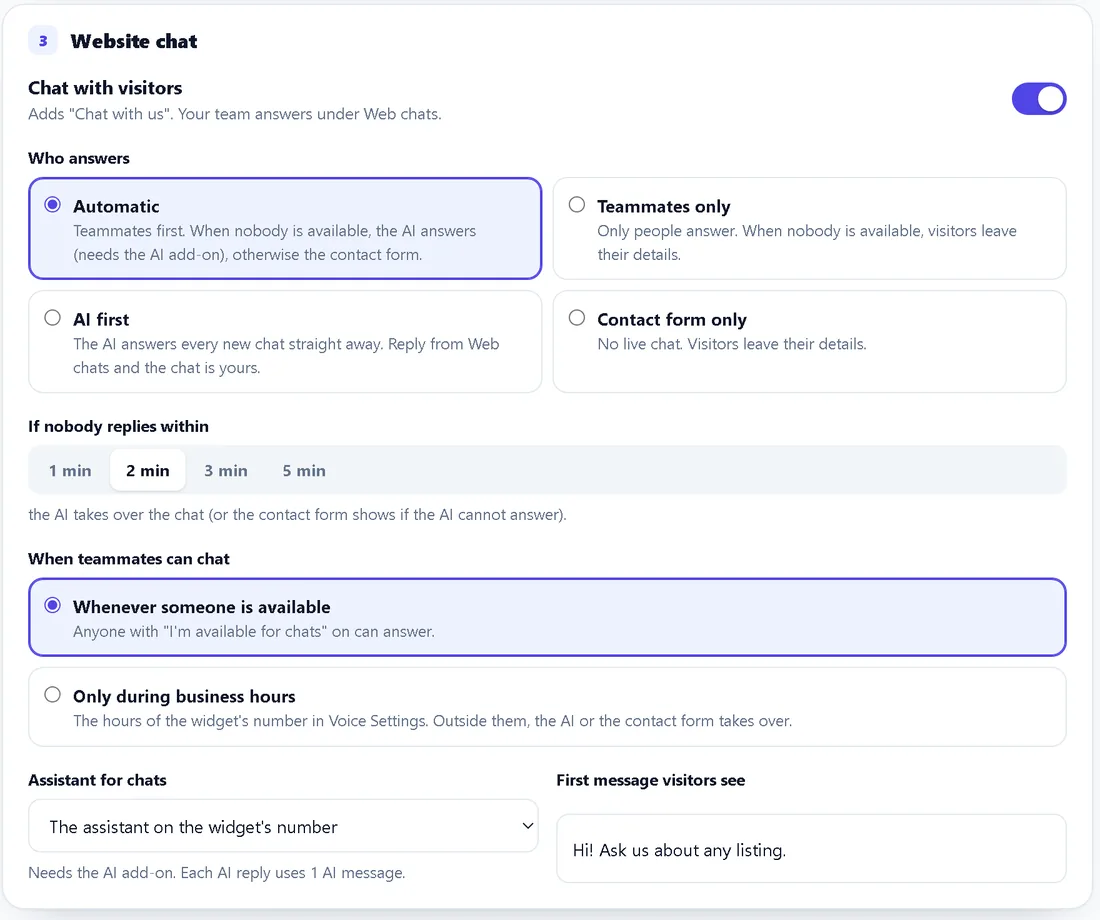
The Website chat settings: who answers, the wait, chat hours, assistant and greeting

Step 2: Copy the install code

Section 1 Add it to your website shows one line of code with a Copy button. It looks like this, with your own numbers:

<script src="https://telbuddy.com/widget.js?v=2" data-company="123" data-key="..." async></script>

The same code shows Call Us, Text Us and Chat with us. There is one widget per TelBuddy account.
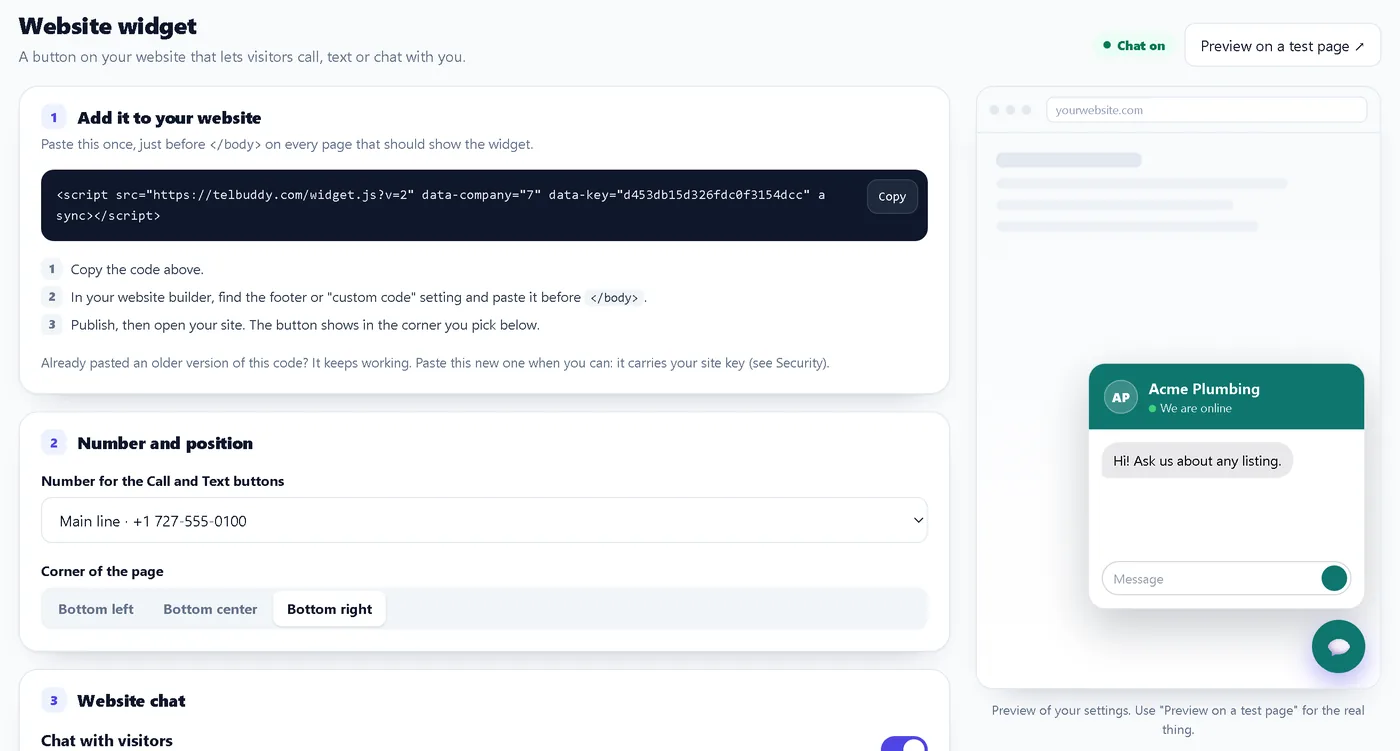
Section 1 of the Widgets page with the install code, and the live preview

Step 3: Paste it before

On every page that should show the widget, paste the code just before the closing </body> tag, then publish.

  • WordPress: a "header and footer scripts" plugin, or your theme's footer code setting. Use a child theme or a plugin so theme updates do not remove it.
  • Webflow, Squarespace, Wix, Framer and similar: the site or page "custom code" setting, in the footer or "before " box.
  • Google Tag Manager works too, but a direct paste is simpler the first time.
  • One page only? Paste it into that page's template instead of the whole site.

Step 4: Preview

On the Widgets page, open Preview on a test page. It loads your real widget on a plain page, so a chat you start there shows up on Web chats like any other.

Then open your own site in a private window:

  1. The bubble shows in the corner you picked.
  2. Open it and send a message. A teammate who has I'm available for chats on sees it on Web chats.
  3. On a phone, the chat opens full screen.

Step 5: Lock it to your websites (recommended)

In section 6 Security, list your websites and switch Only these websites on. Nobody else can then load your chat or use your AI messages. See security.

Already had the widget?

If you added the TelBuddy widget before, the old code keeps working and gets the chat button as soon as you switch chat on. Paste the new code when you can: it carries your site key.

Troubleshooting

I pasted the code but see nothing.

  • Make sure you are looking at the page you edited (caches, a CDN, the wrong environment).
  • View the page source and search for widget.js.
  • If Only these websites is on, check the site is in your list.
  • Try a private window without extensions.

The bubble shows but there is no Chat with us button. Chat is off. Switch Chat with visitors on and save.

Chats are not reaching the team. Someone needs I'm available for chats switched on, on the Web chats page, with TelBuddy open. Otherwise the AI or the contact form answers, depending on who answers.

Related