Help Center
Getting Around TelBuddy
A real, screenshot-by-screenshot tour of every part of the dashboard: what each screen does and how to use it. New here? Start by connecting Twilio or Telnyx. Want more depth on a specific feature? See the full documentation.
Need help? Contact Us
1. Logging In & Your Inbox
Log in with the email and password you set during signup. You'll land on the SMS Dashboard, where every text to every number you've synced shows up in one shared inbox your whole team can see.
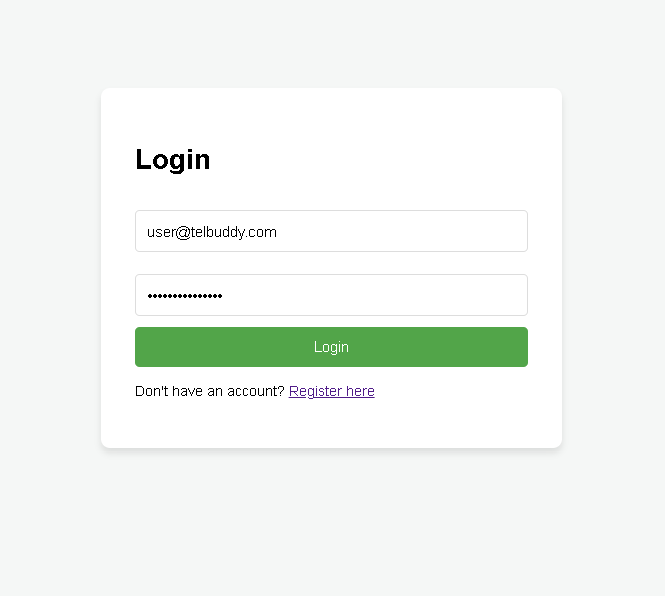
The login screen: same email/password you used during setup.
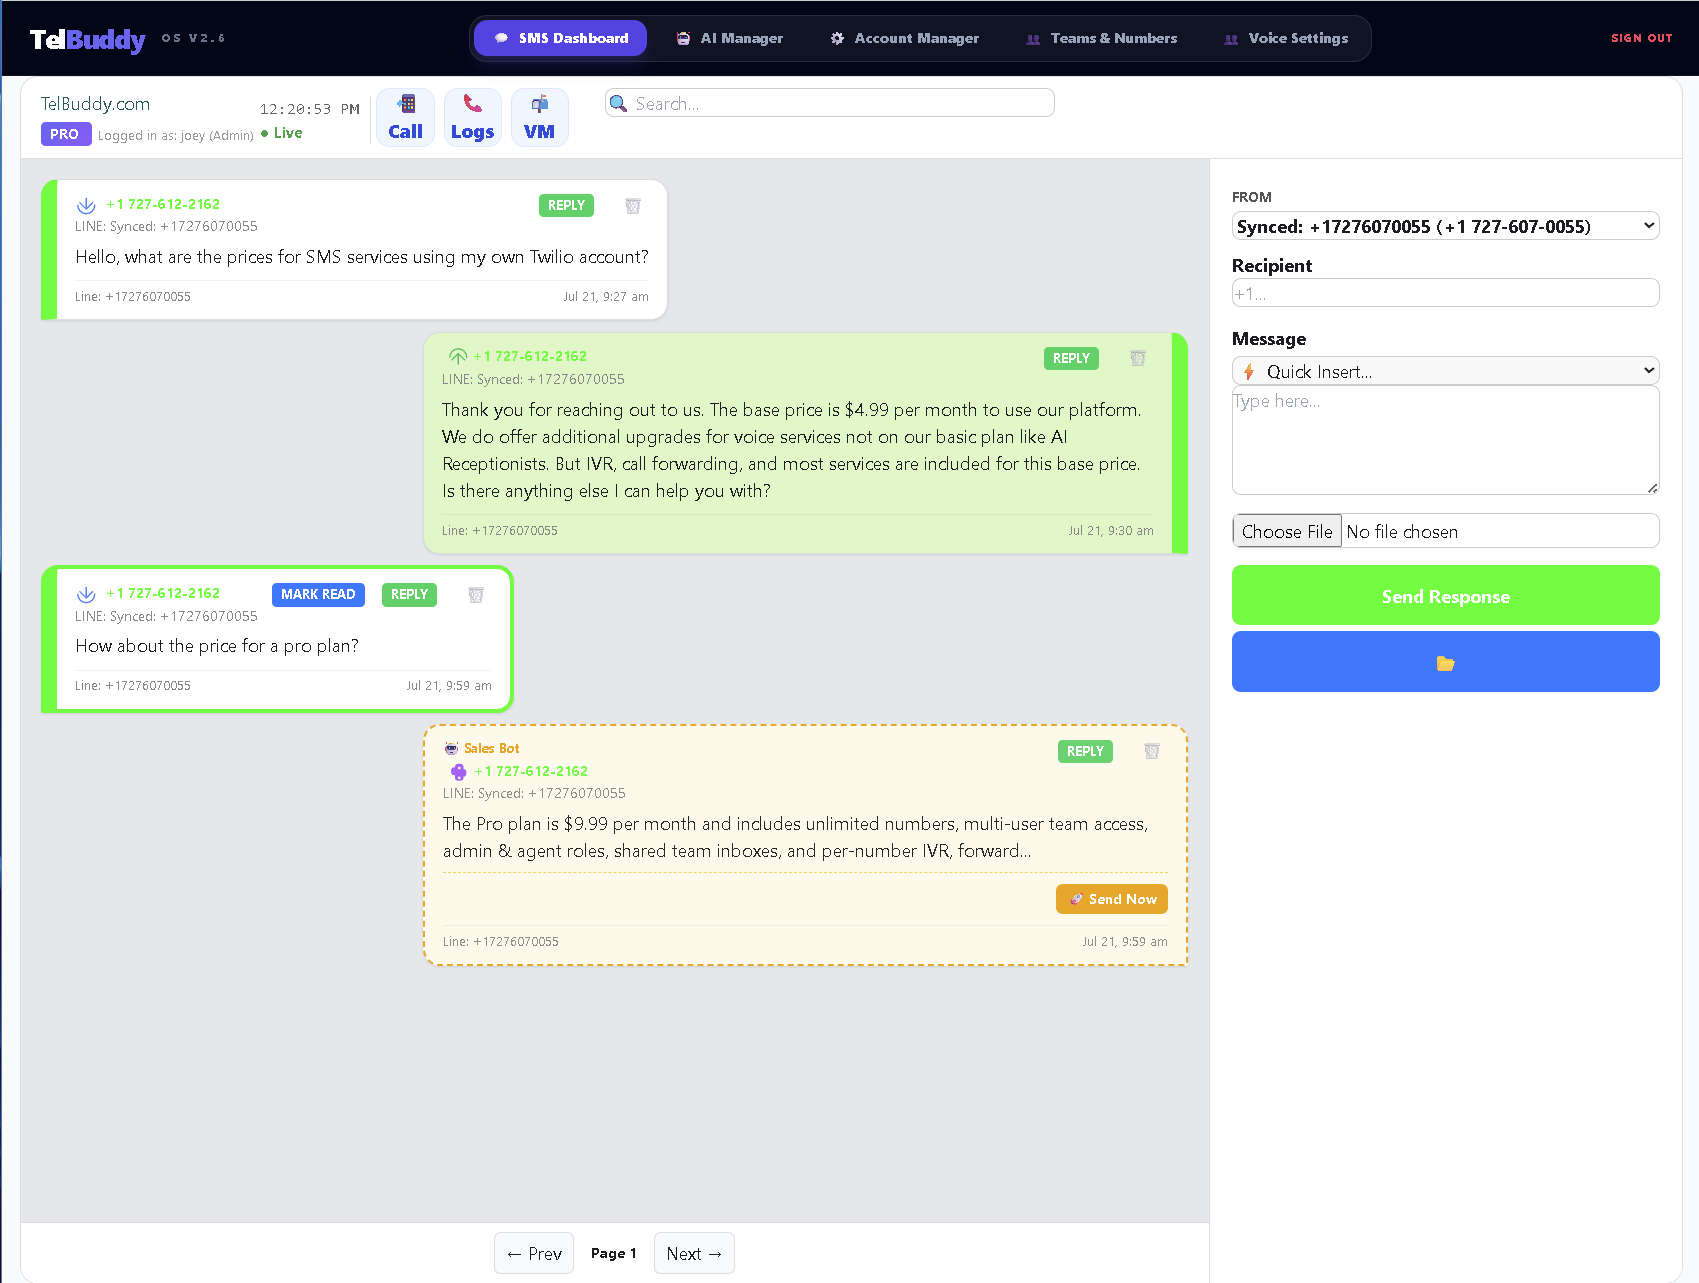
The main inbox: conversations on the left, reply panel on the right, quick actions (Call, Logs, VM) at the top.
2. Replying & AI Drafts
Click "Reply" on any conversation to open the reply panel. Pick which of your numbers to send from, use a saved Quick Insert template, or just type your own message.
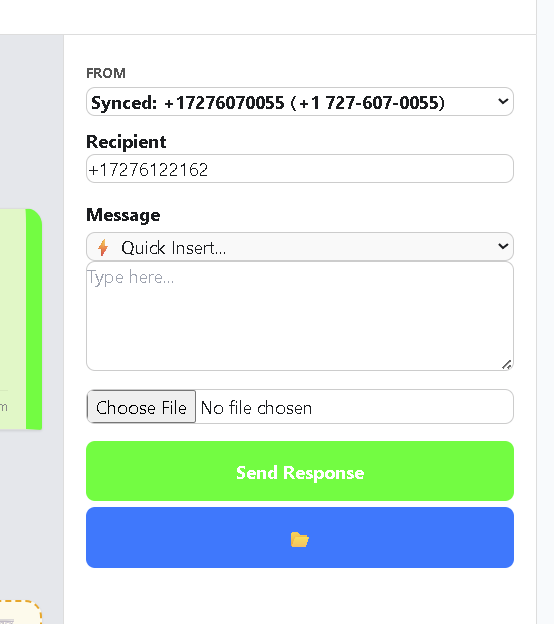
The reply panel: choose your From number and message.
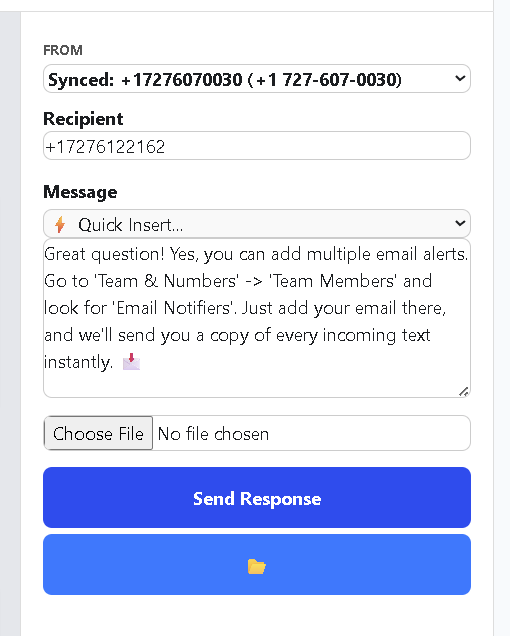
Composing a reply before hitting send.
If a bot is assigned to a number in Draft mode, the AI prepares a suggested reply for you to review. Nothing sends until you tap "Send Now." Switch a bot to Auto mode later once you trust it.
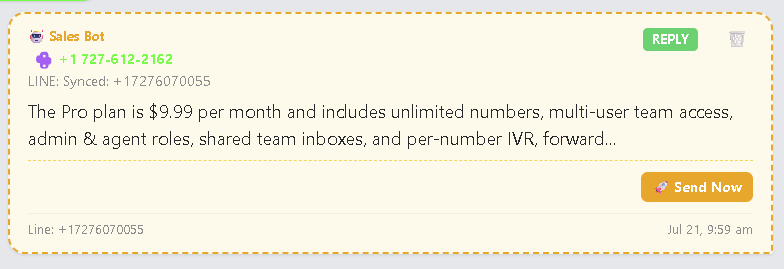
An AI draft reply, waiting for a human to approve and send it.
3. Calling, Call Logs & Voicemail
The three icons at the top of the inbox (📲 Call, 📞 Logs, 📬 VM) open the outbound dialer, your call history, and your voicemail inbox, all without leaving the SMS Dashboard.
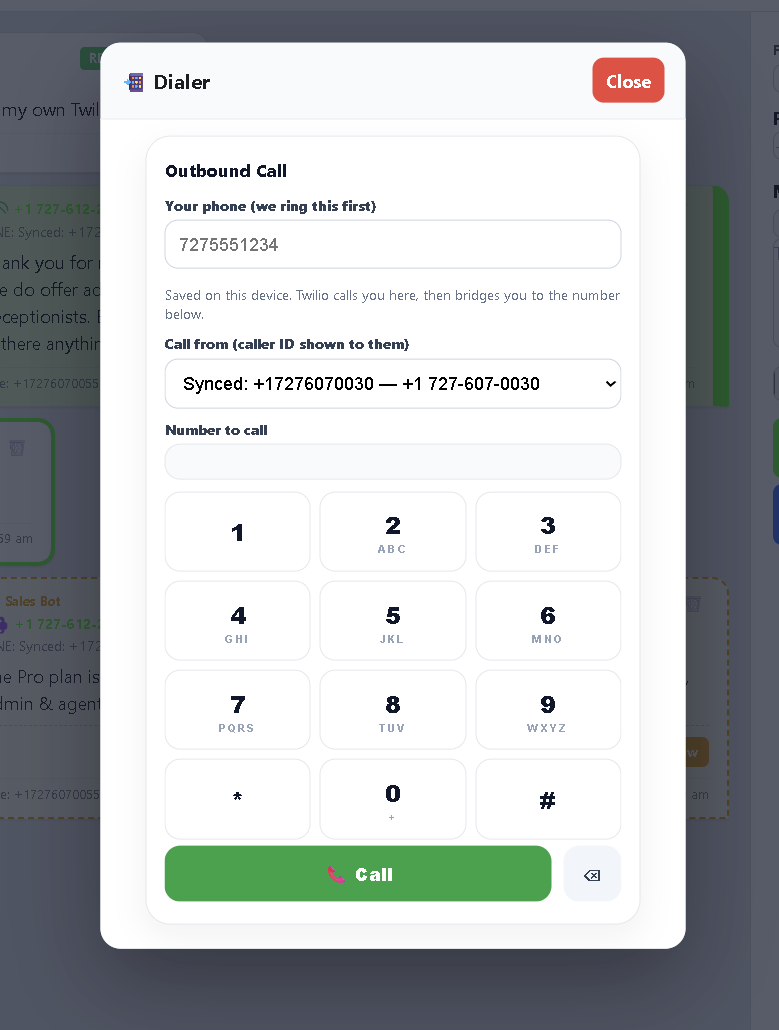
The dialer: enter your own phone number once (it's saved), pick which synced number shows as your caller ID, then dial. TelBuddy rings you first, then bridges you to the number you dialed.
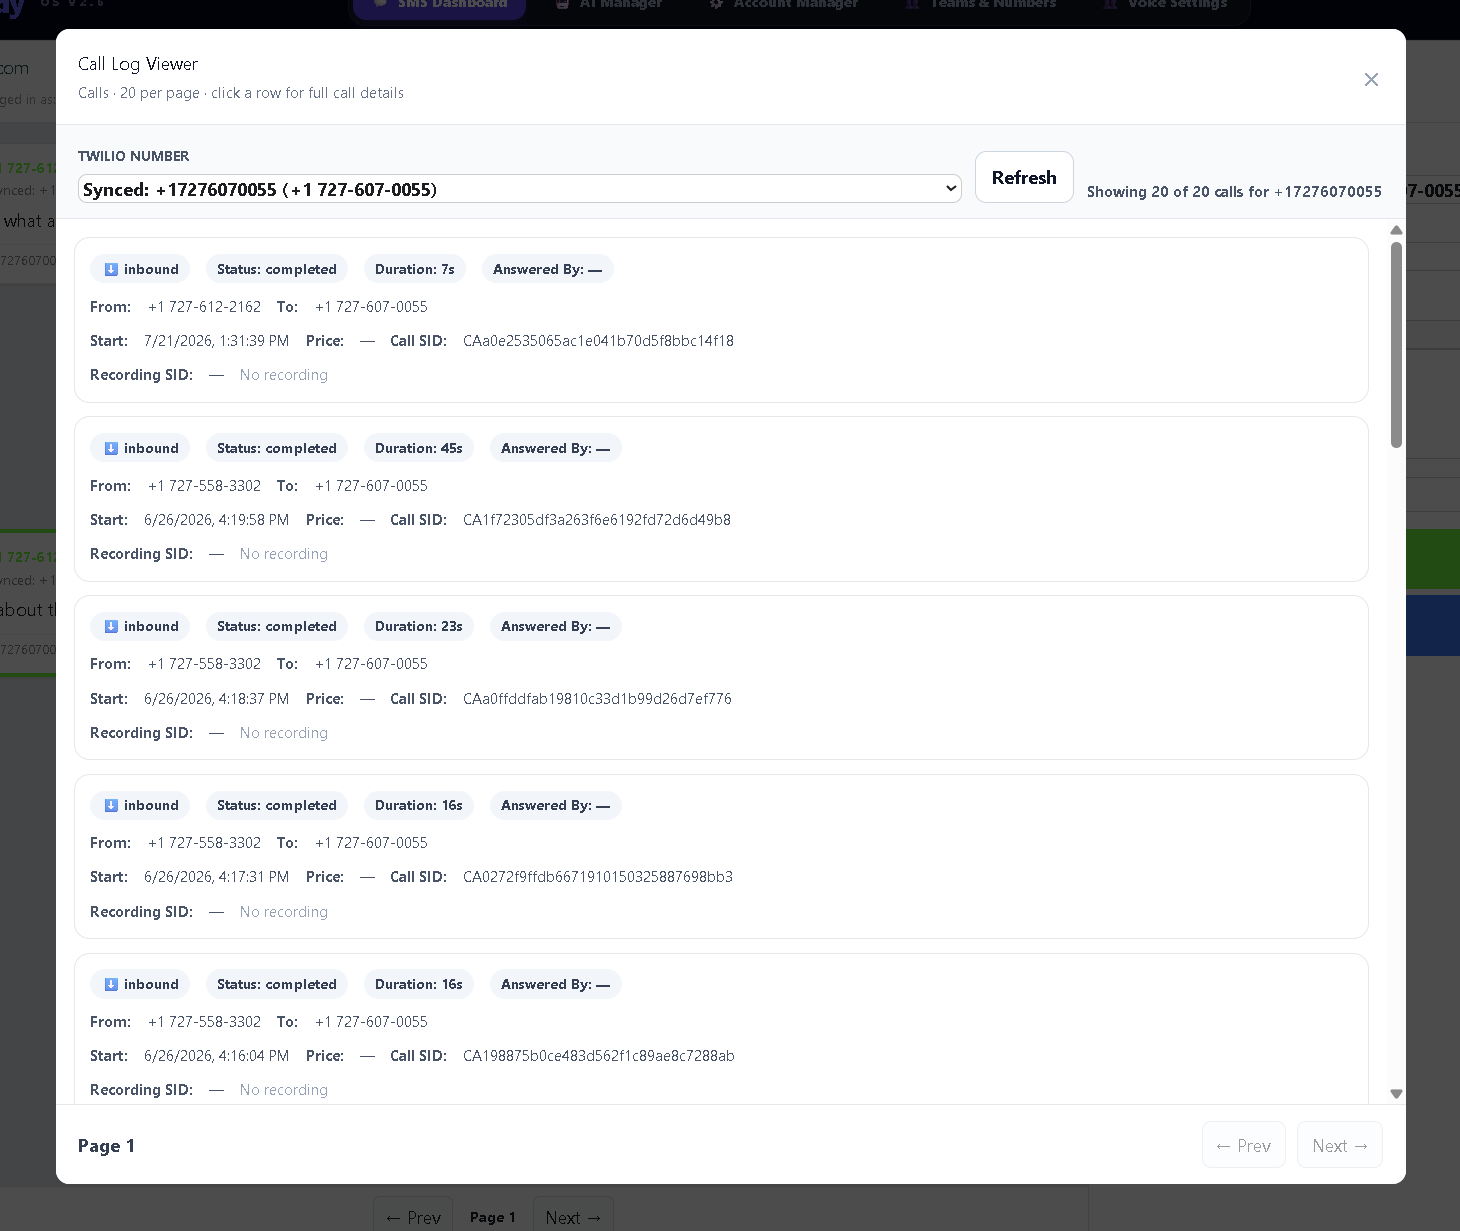
Call Log Viewer: every call for a selected number, newest first, click a row for full details.
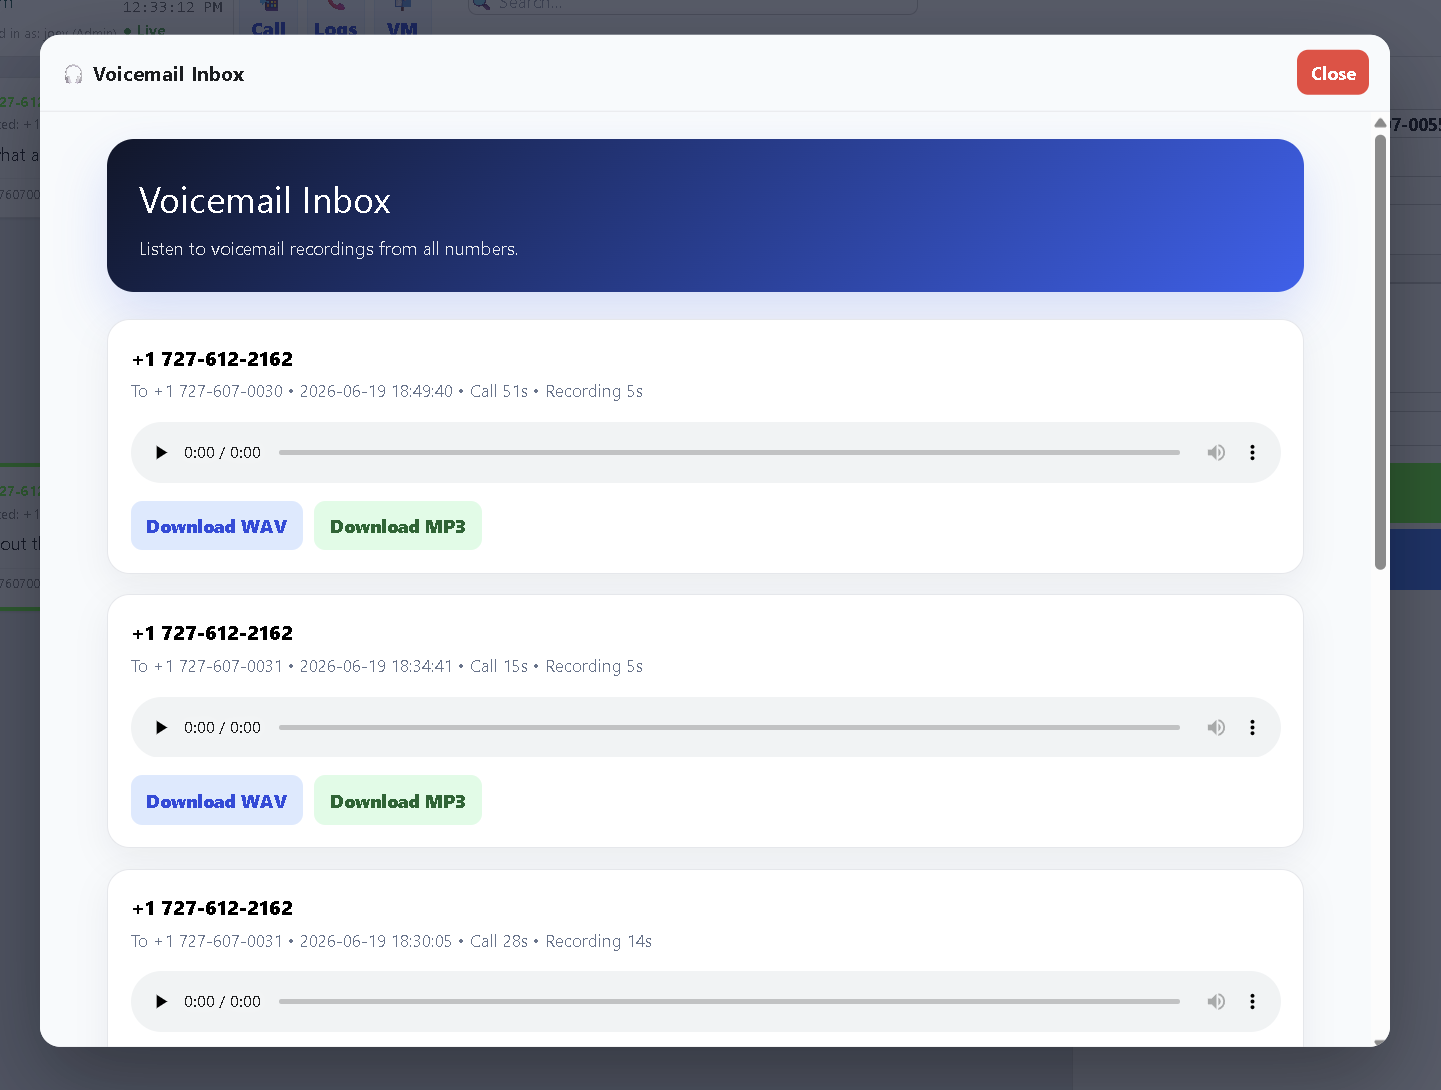
Voicemail Inbox: listen right in the browser, or download the WAV/MP3.
4. System Manager
Admin-only settings under Teams & Numbers in the top nav: invite teammates, manage roles and groups, sync your Twilio numbers, and control notifications.
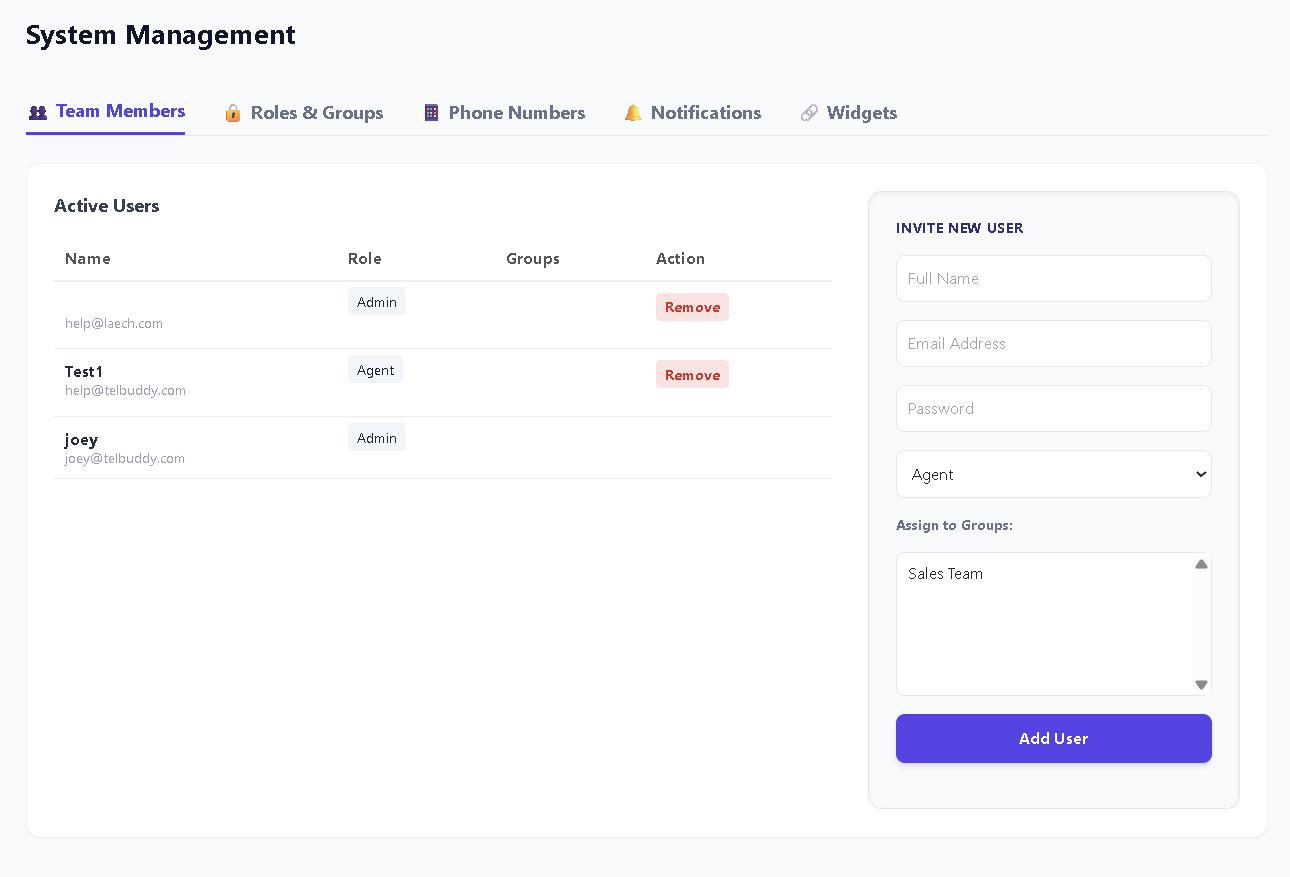
Team Members: invite a teammate as Admin or Agent.
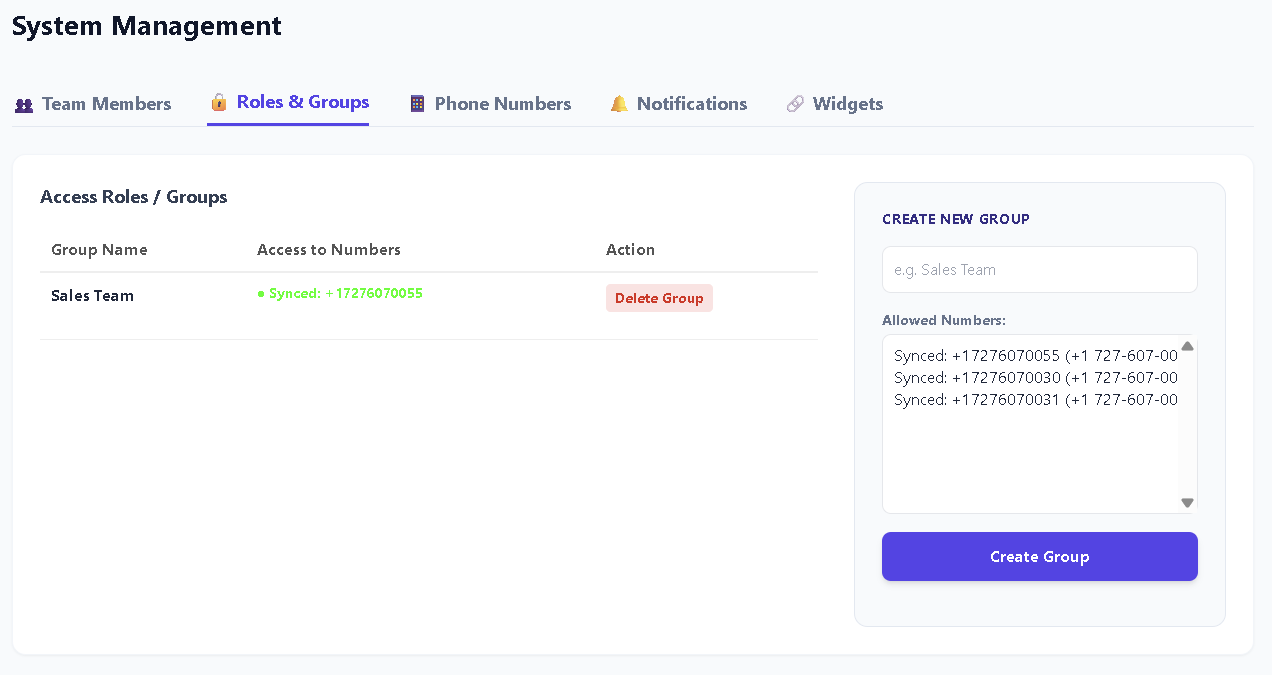
Roles & Groups: control who can see which numbers.
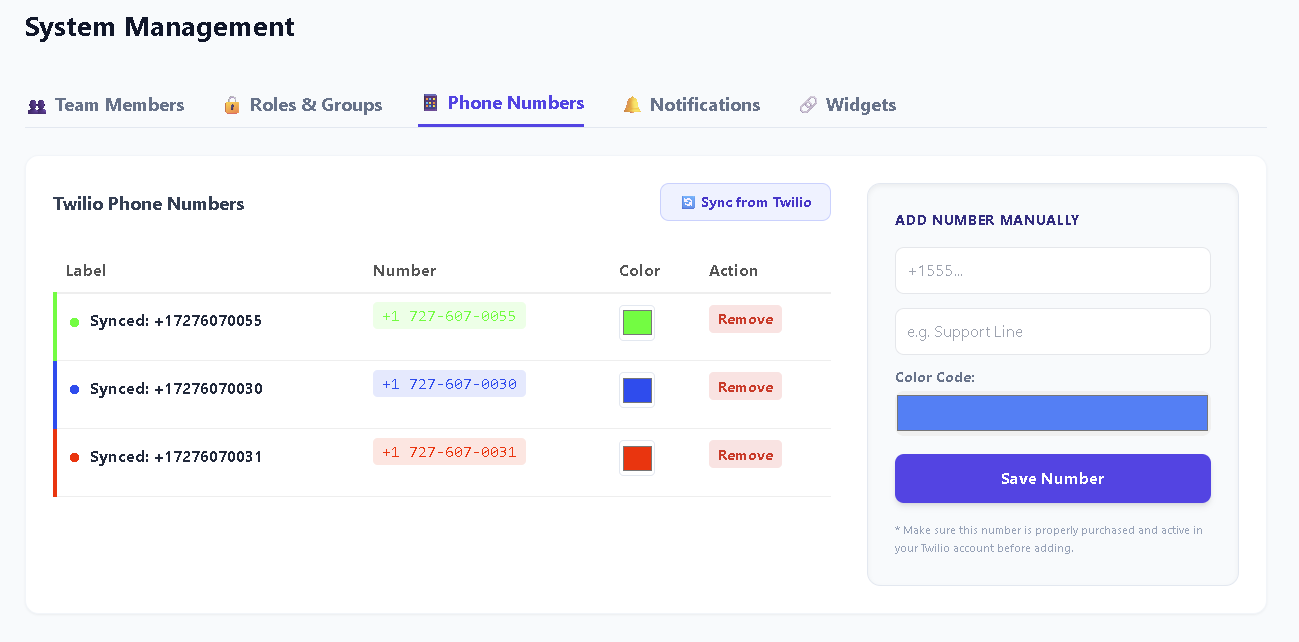
Phone Numbers: sync from Twilio or add one manually.
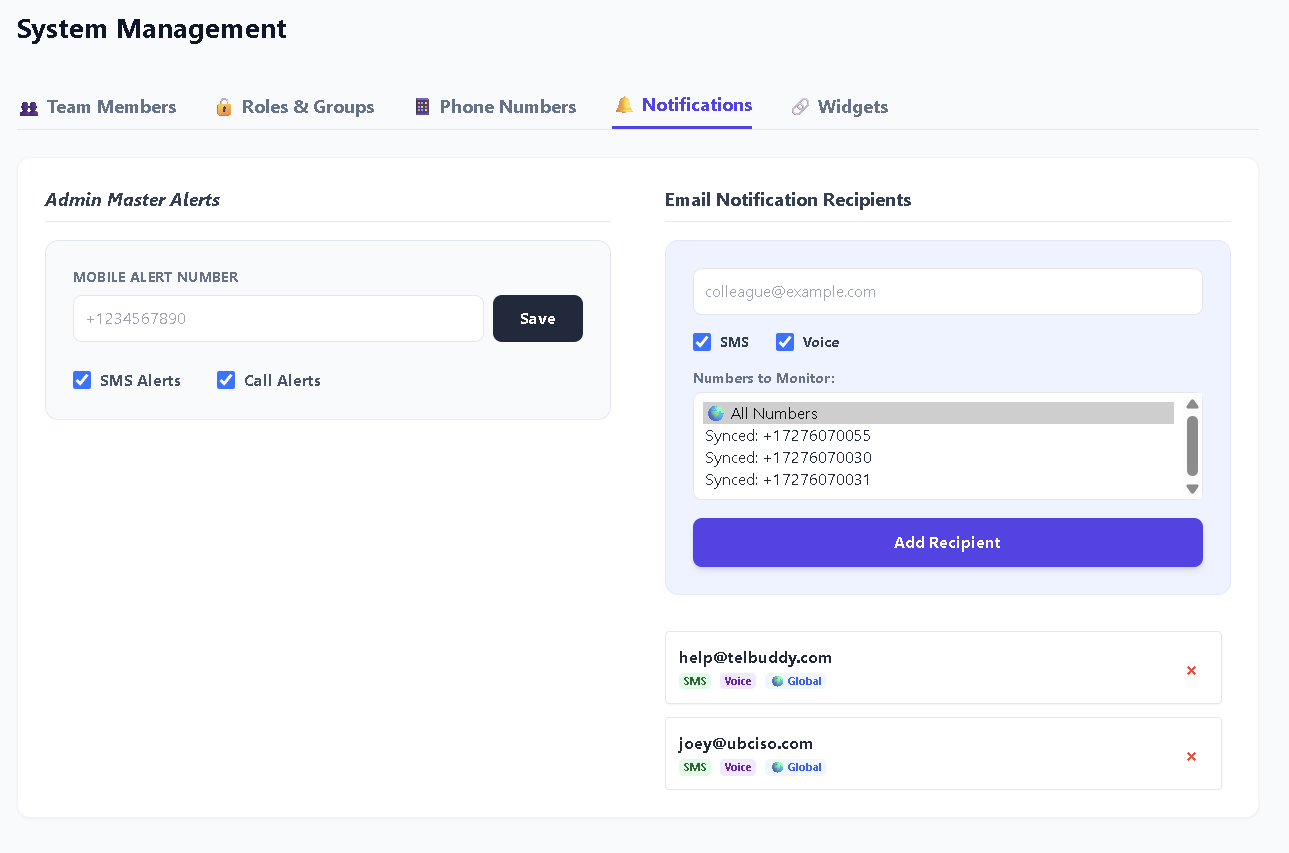
Notifications: choose what you get alerted about.
5. The "Call Us / Text Us" Website Widget
Also under Teams & Numbers, the Widgets tab lets you pick which number your embeddable website button uses, which corner it floats in, and preview it live before copying the embed code onto your own site.
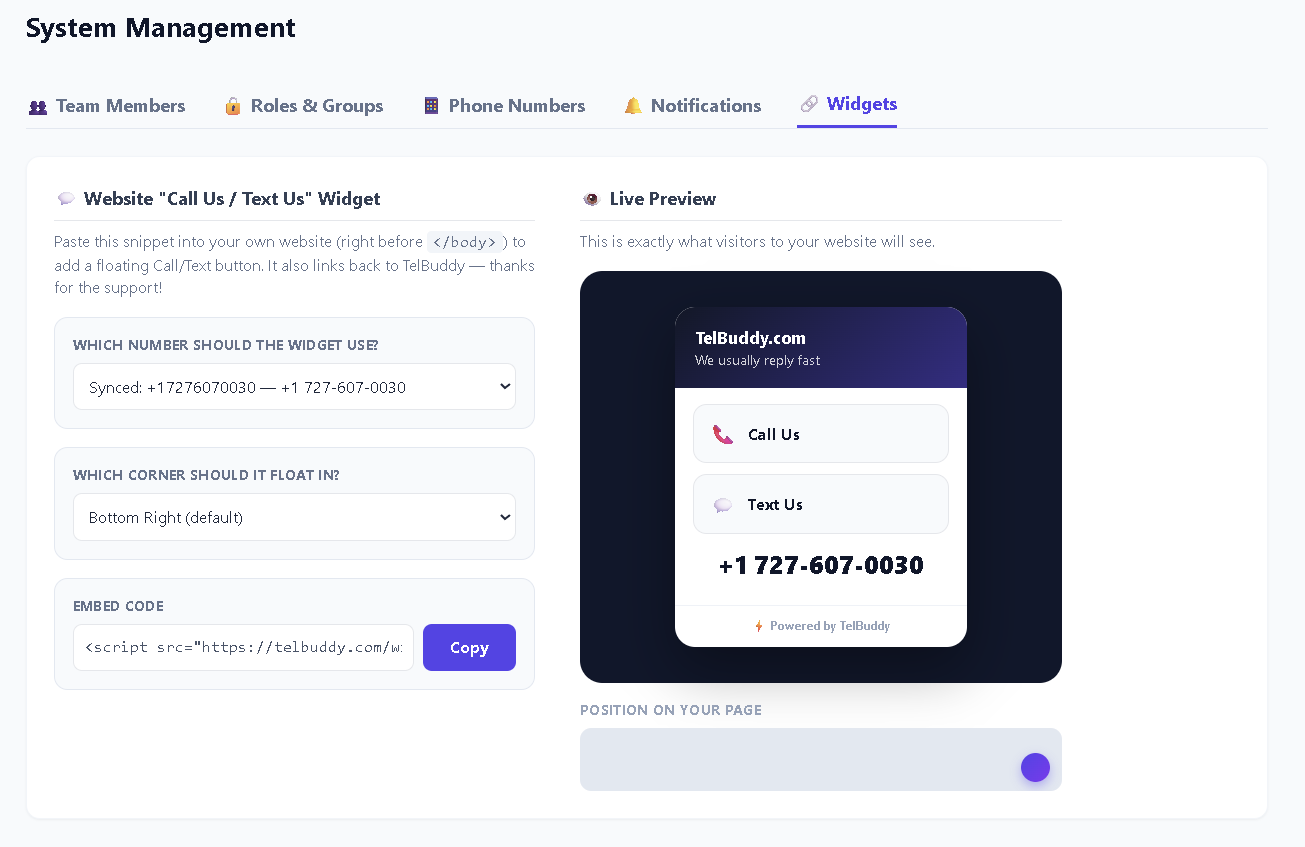
Pick the number and position, see exactly what visitors will see.
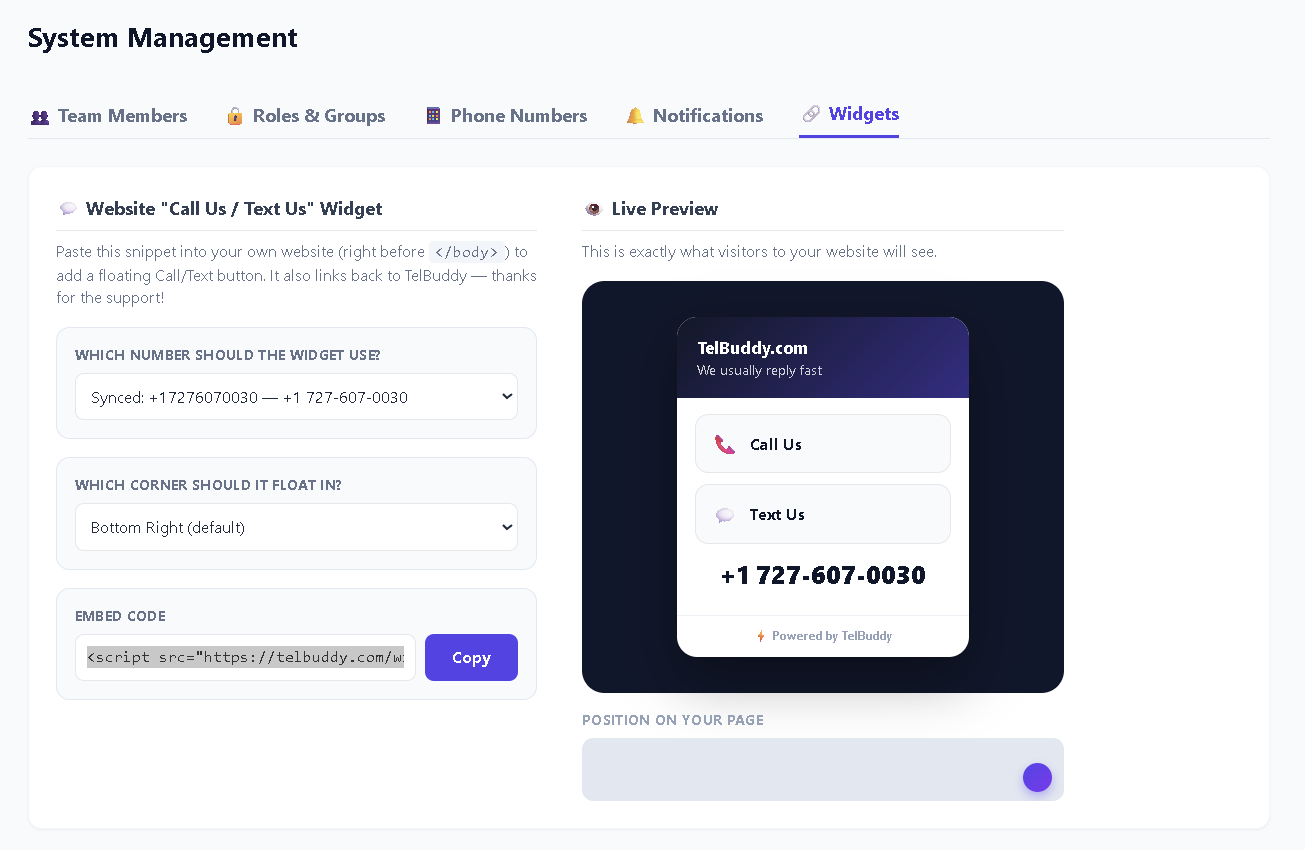
Copy this one script tag into your own site, right before </body>.
Also: Website Chat (live chat, AI or a contact form). The same widget can add a Chat with us button. Visitors chat with a teammate, get AI answers from your knowledge base, or leave their details, and you choose how long a live chat waits before the AI steps in. Photos up to 8 MB (no PDFs or other files from visitors). Switch it on in the same Widgets tab. Overview: Website Chat, and setup: Website Chat docs. Call Us and Text Us remain the one-tap call or text buttons described above.
6. Voice Settings & IVR Phone Menus
Watch a phone menu, call queue and AI receptionist built in 10 minutes
The whole of sections 6 and 7 done live on a Twilio or Telnyx number, start to finish. No porting.
Prefer YouTube? Desktop cut or phone cut.
Under Voice Settings, control how each number handles calls: forwarding, voicemail, business hours, AI receptionist, or a full "Press 1 for Sales" phone menu, built visually.
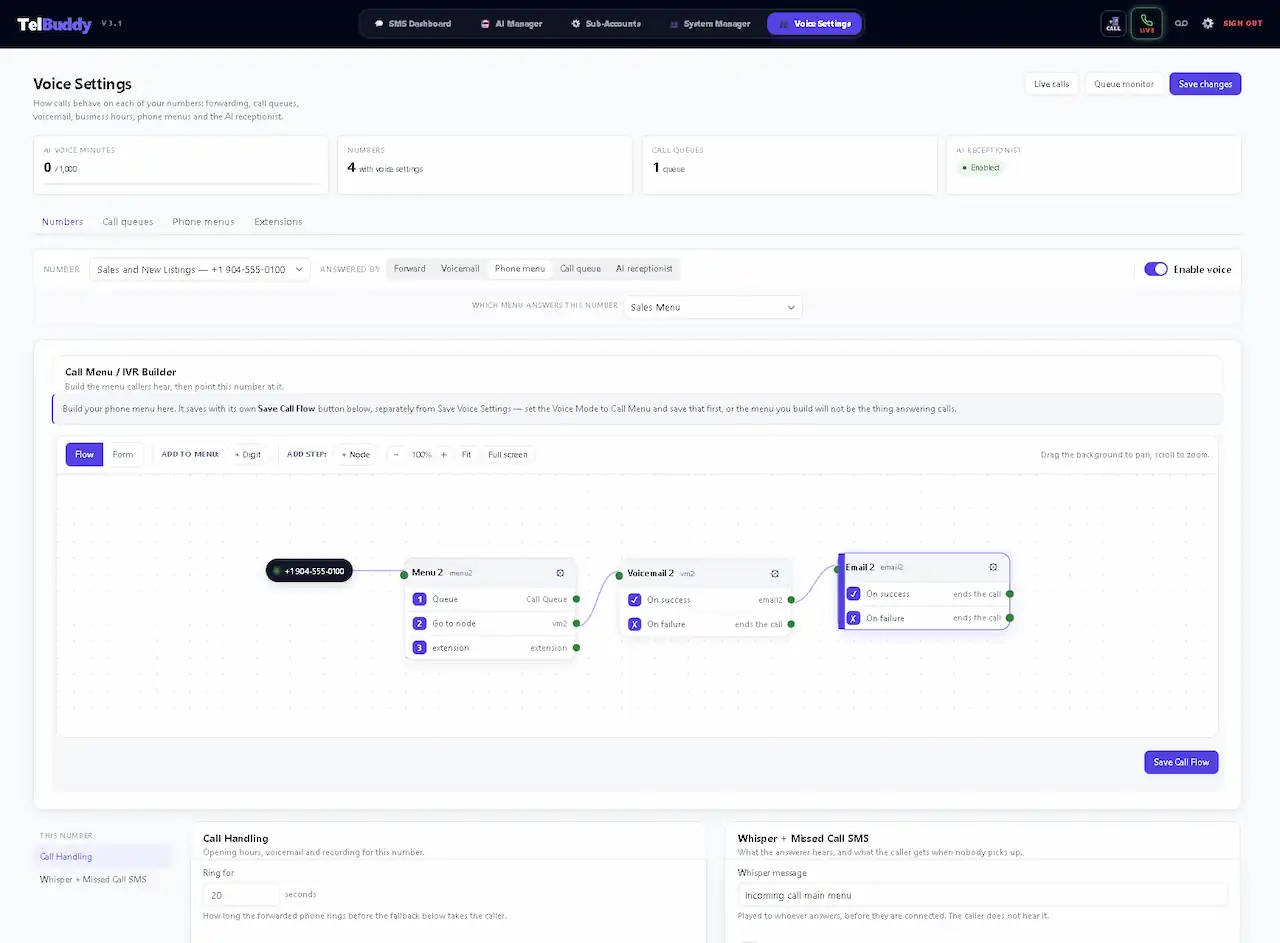
The Voice Settings home: pick a number, then configure its call behavior below.
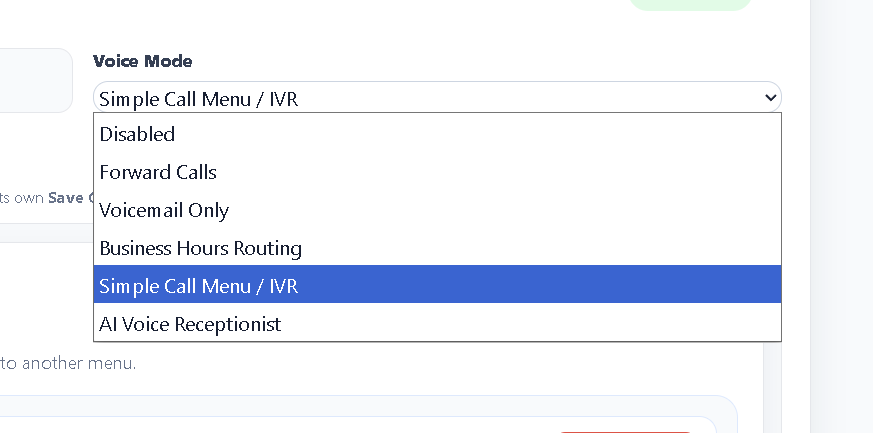
Choose what answers a number (Answered By).
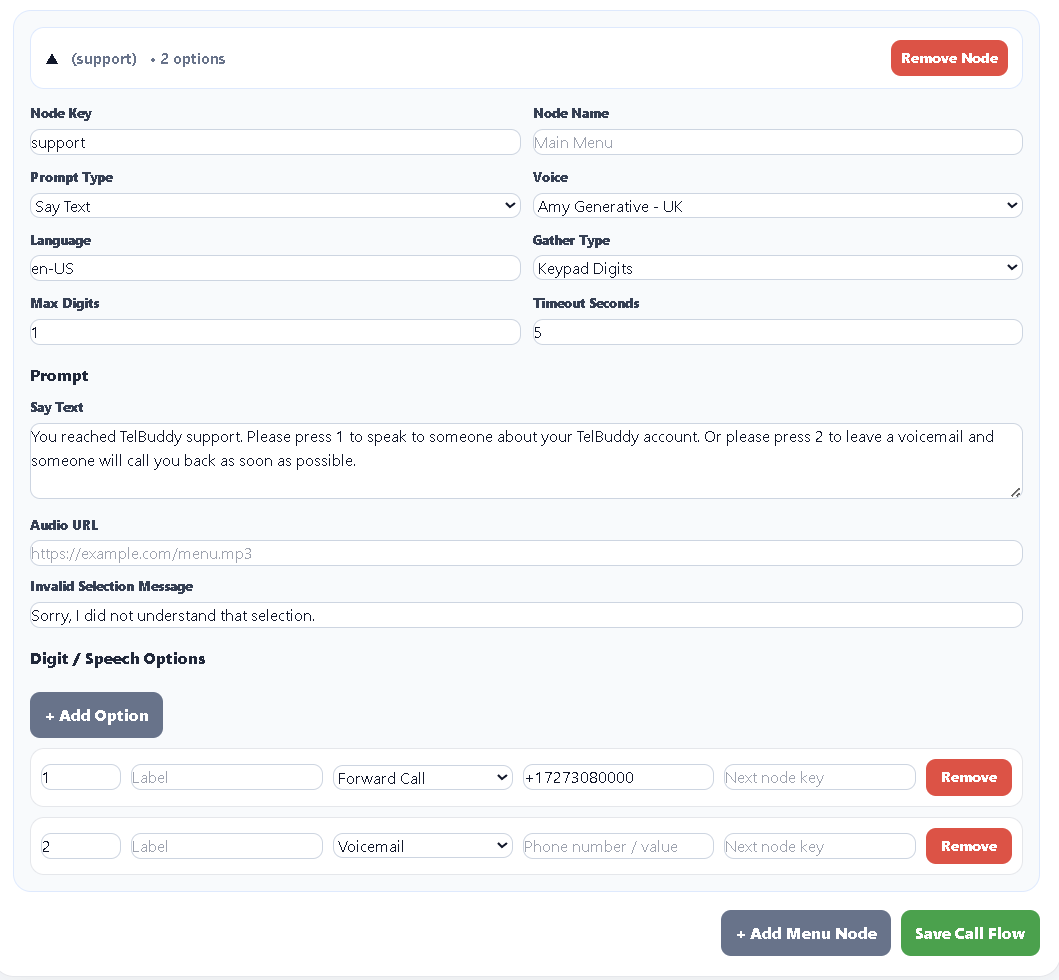
Adding a new menu option. No TwiML required.
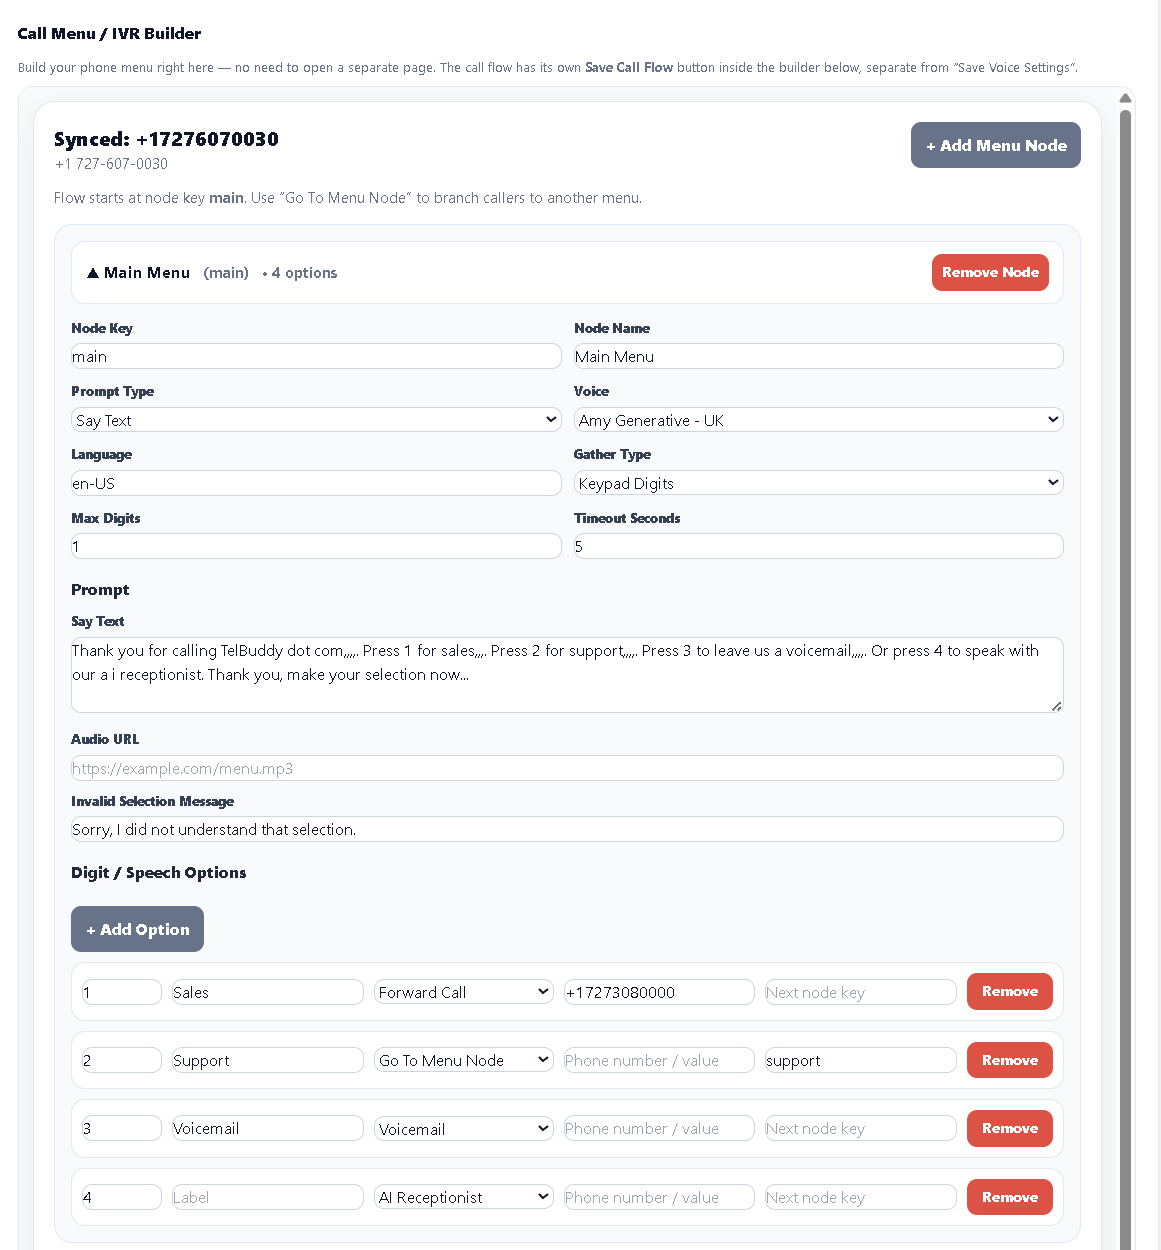
The IVR builder: build "Press 1 for Sales, Press 2 for Support" menus by clicking, not coding.
7. AI Manager
Everything AI-related lives under AI Manager in the top nav: your bots, their knowledge base, call transfer rules, appointment intake, and dedicated AI call logs.
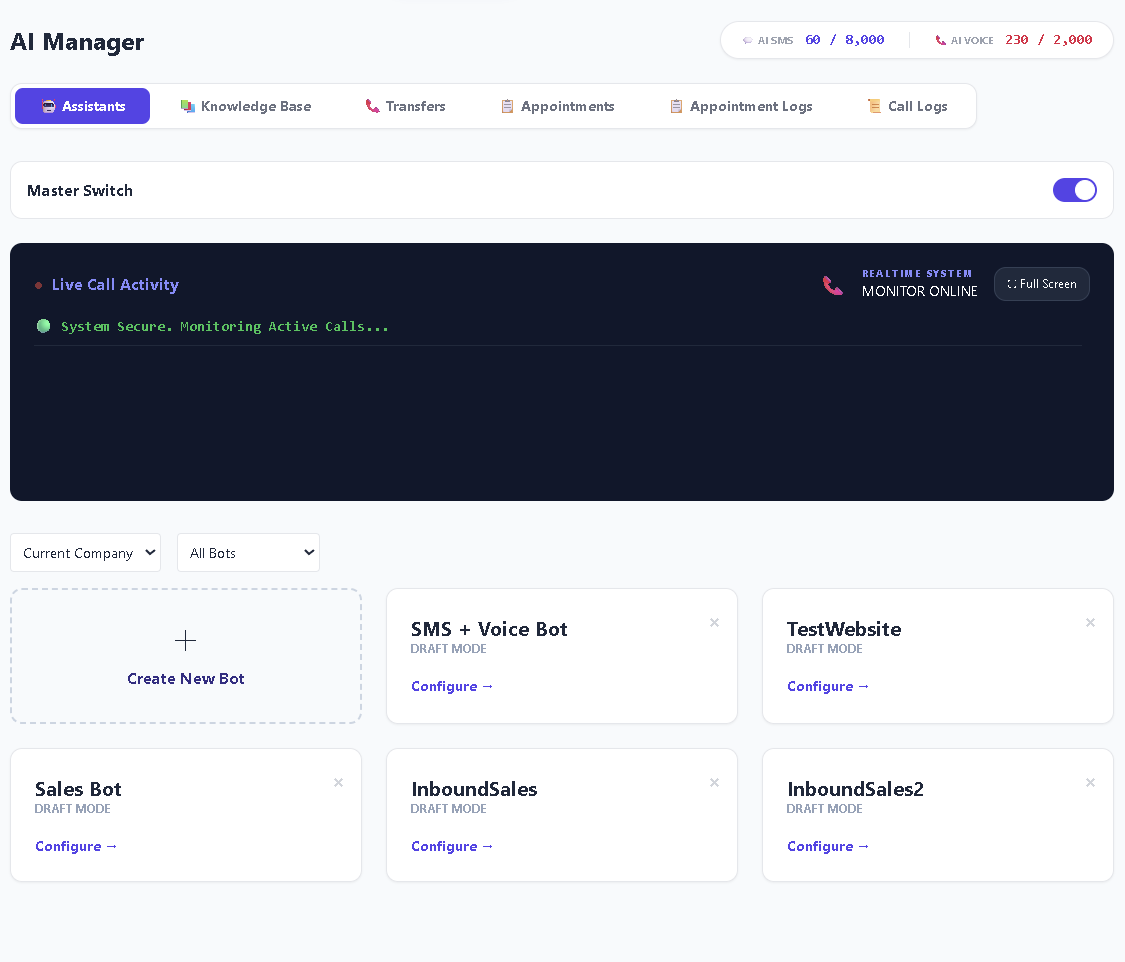
Assistants: every bot you've created, with a live call activity monitor.
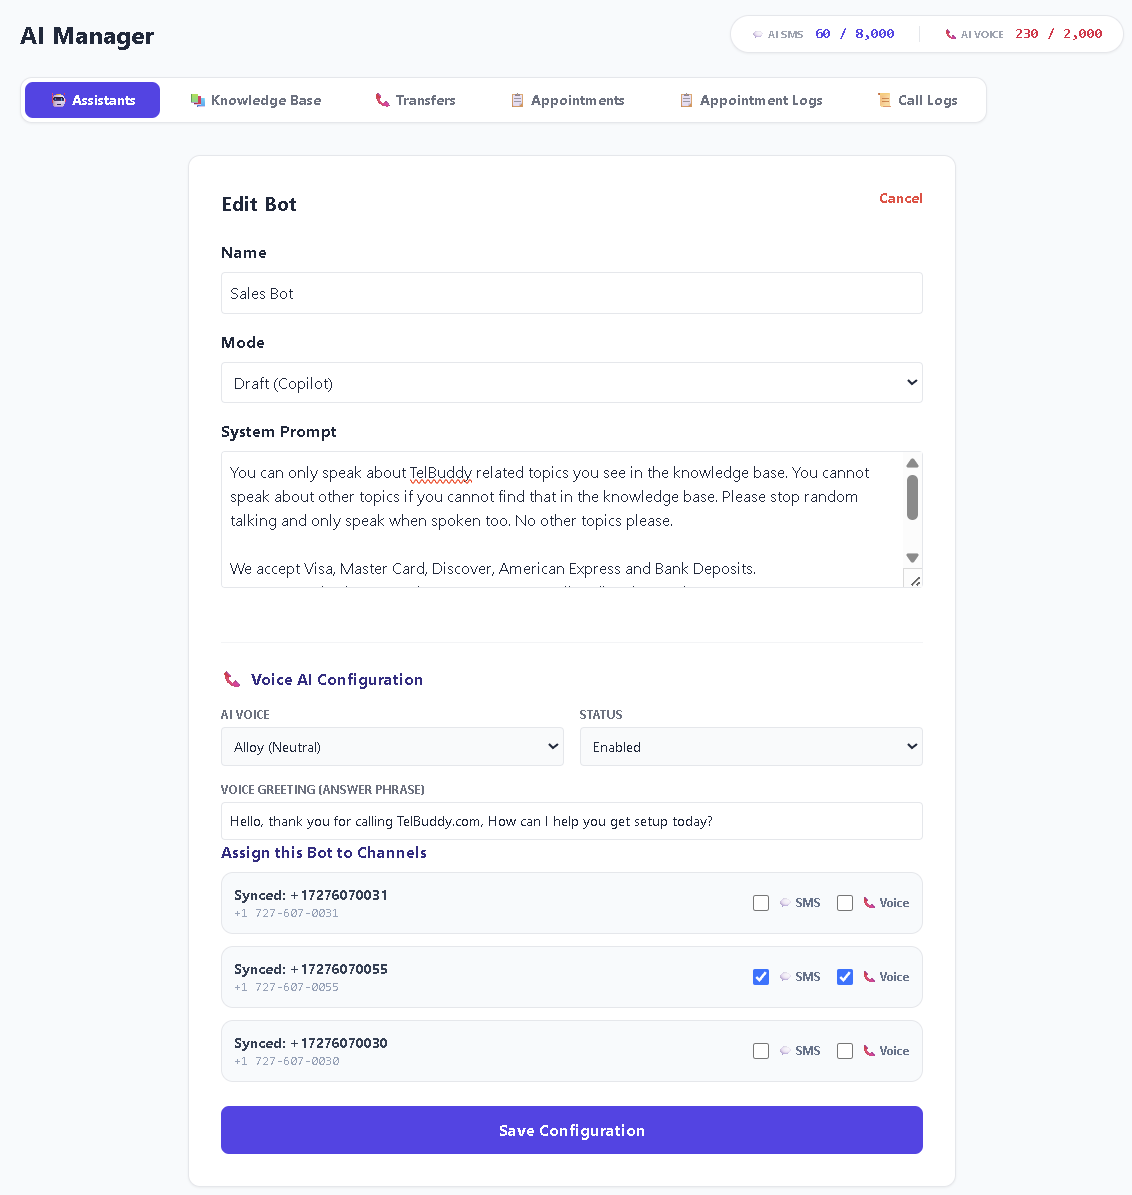
Configuring a single bot: its system prompt and Draft/Auto mode.
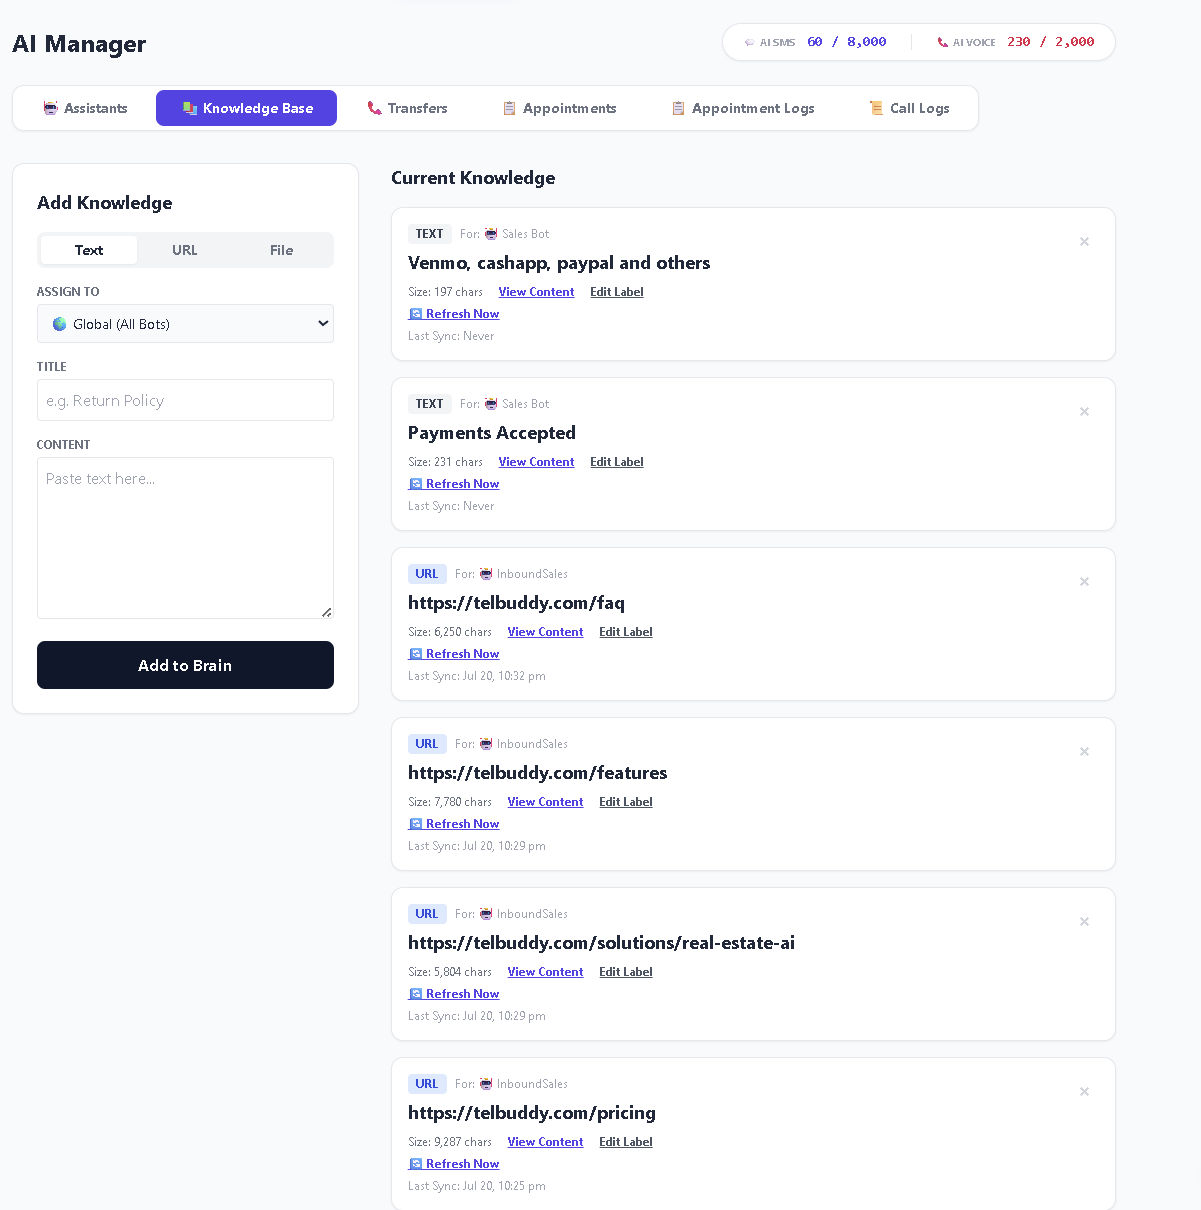
Knowledge Base: paste text, a URL, or upload a file so the AI can answer accurately about your business.
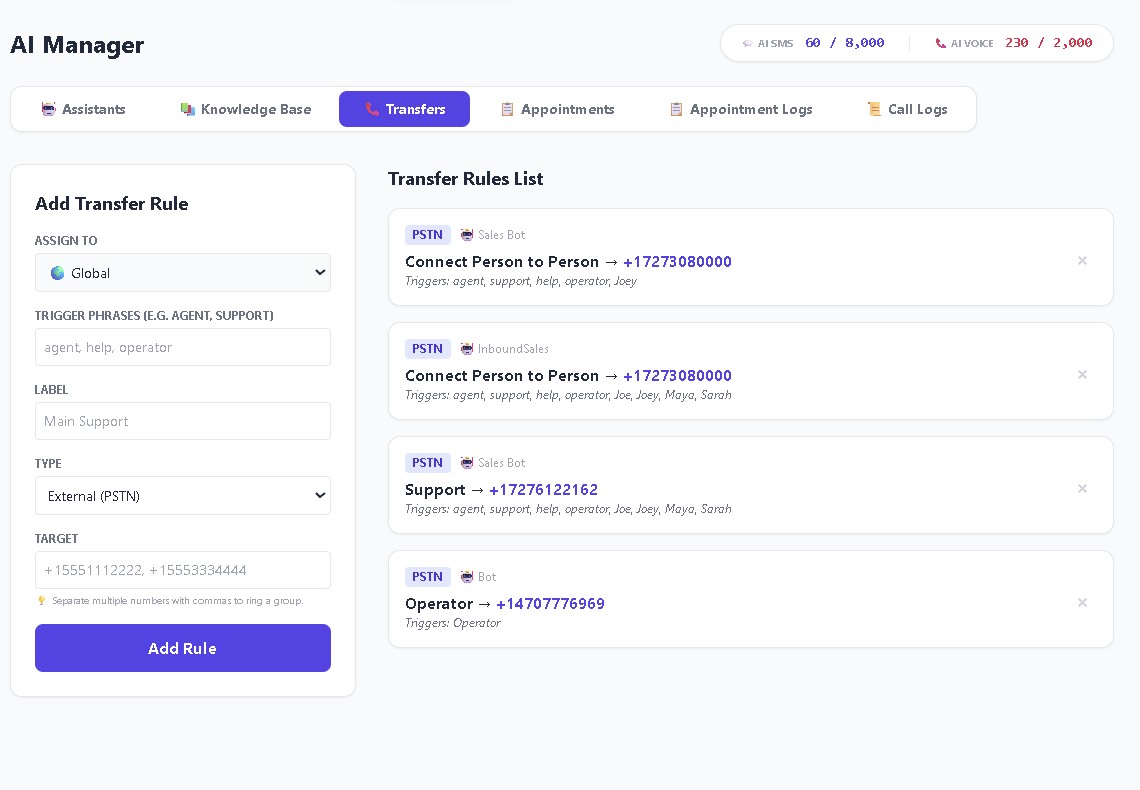
Transfers: trigger words that hand a call to a human.
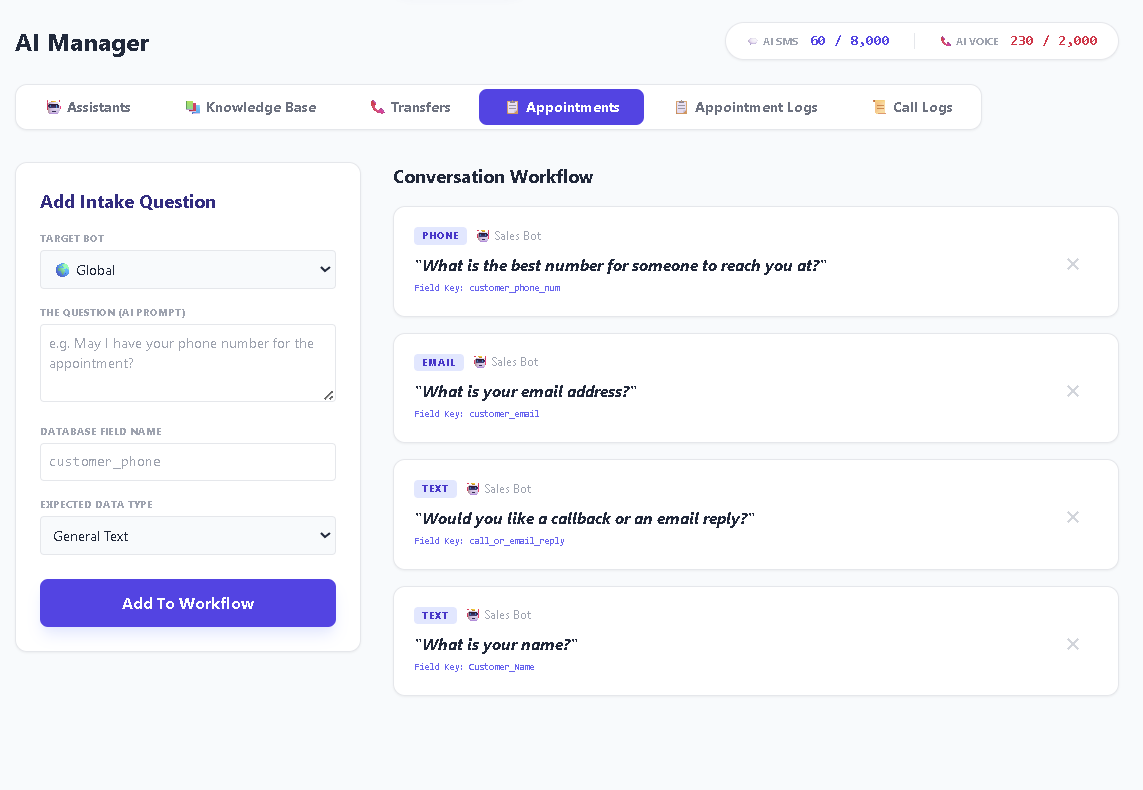
Appointments: what the AI collects to book one.
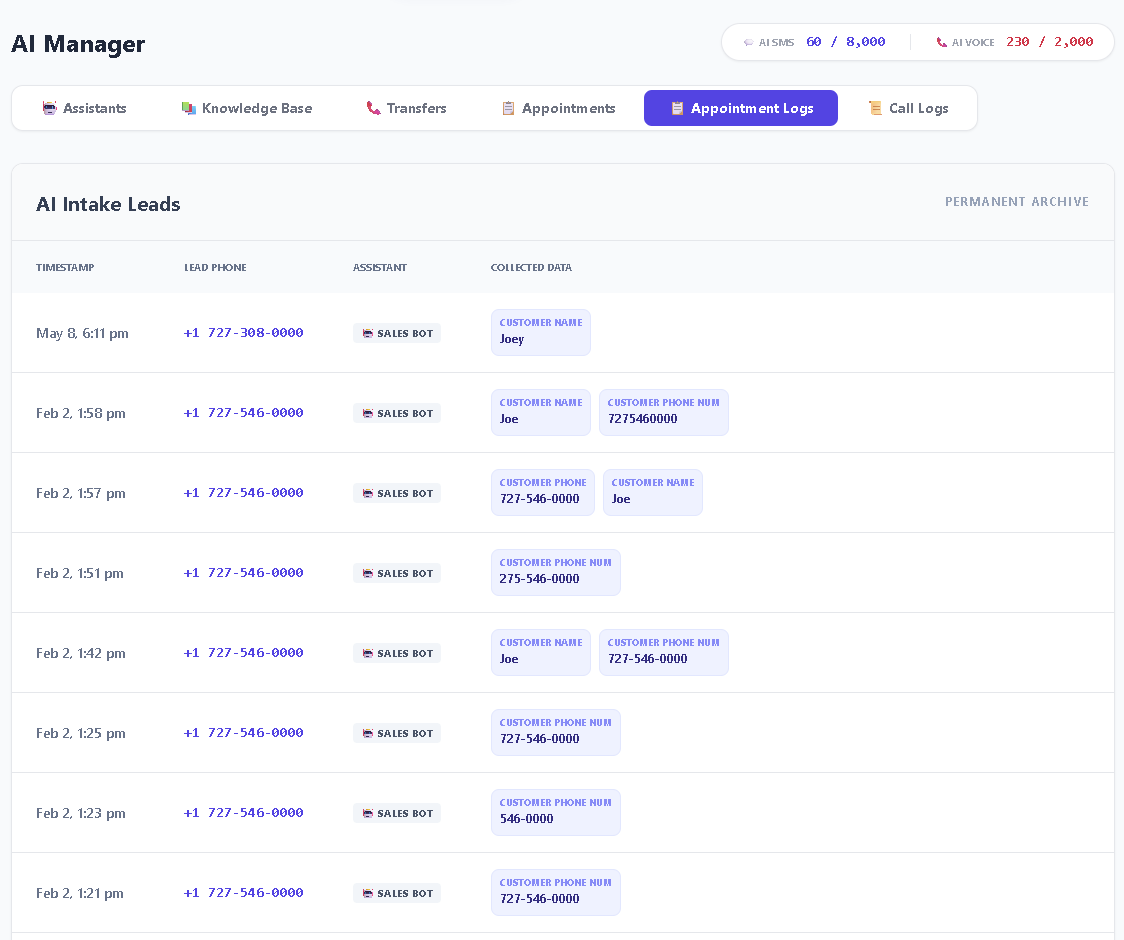
Appointment Logs: everything the AI has booked.
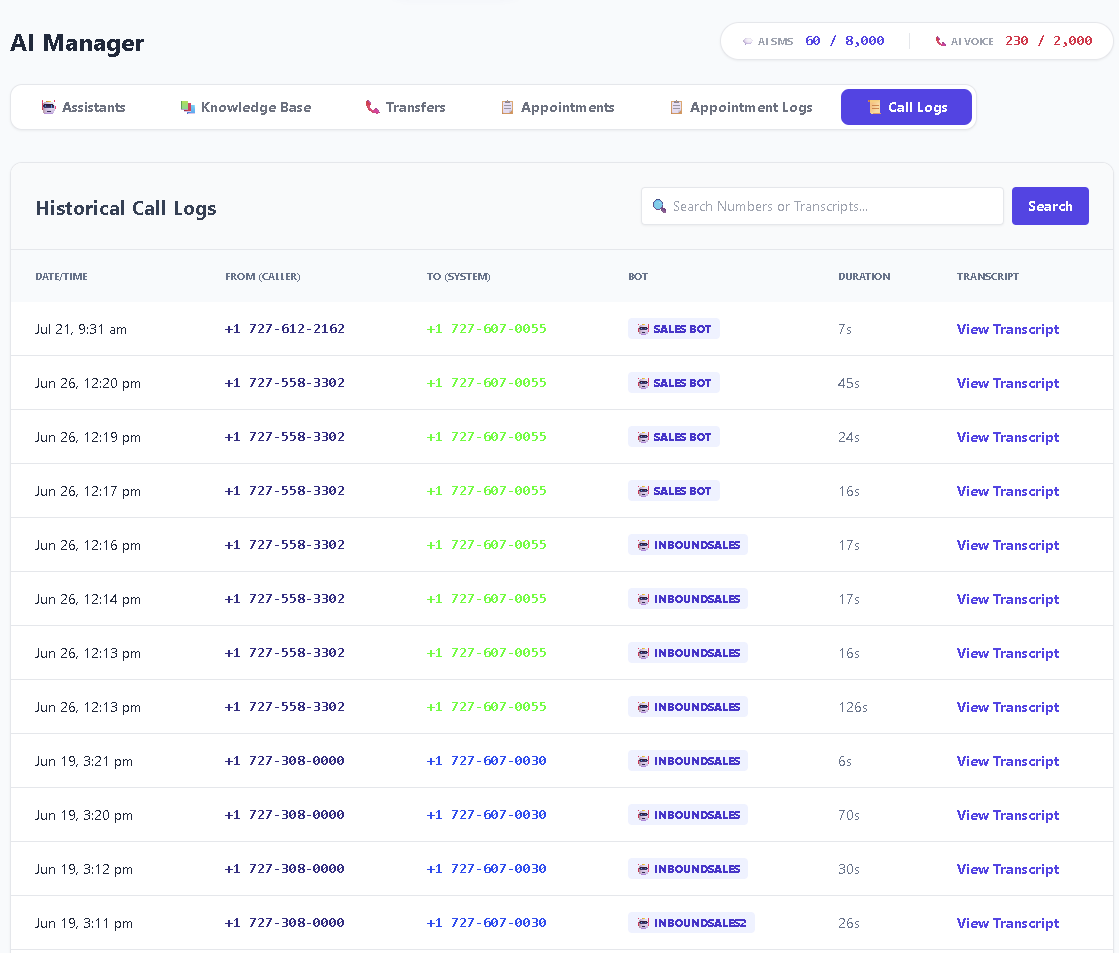
Call Logs (AI Manager view): calls the AI receptionist handled.
8. Managing More Than One Business
Run more than one business? Sub-Accounts lets you add and switch between them. Every business still gets its own dedicated Twilio or Telnyx account. TelBuddy never shares carrier credentials or numbers between businesses, even ones you own yourself.
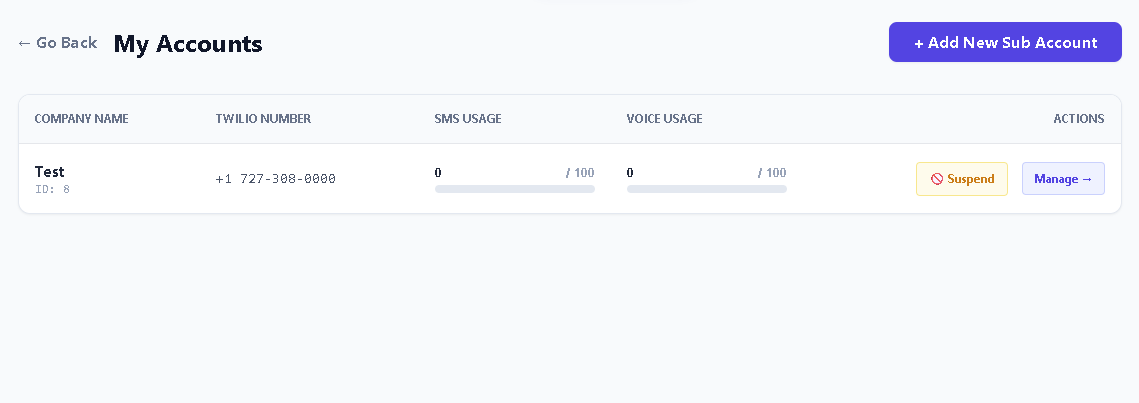
My Accounts: every business you manage, with its own usage and Suspend/Manage controls.
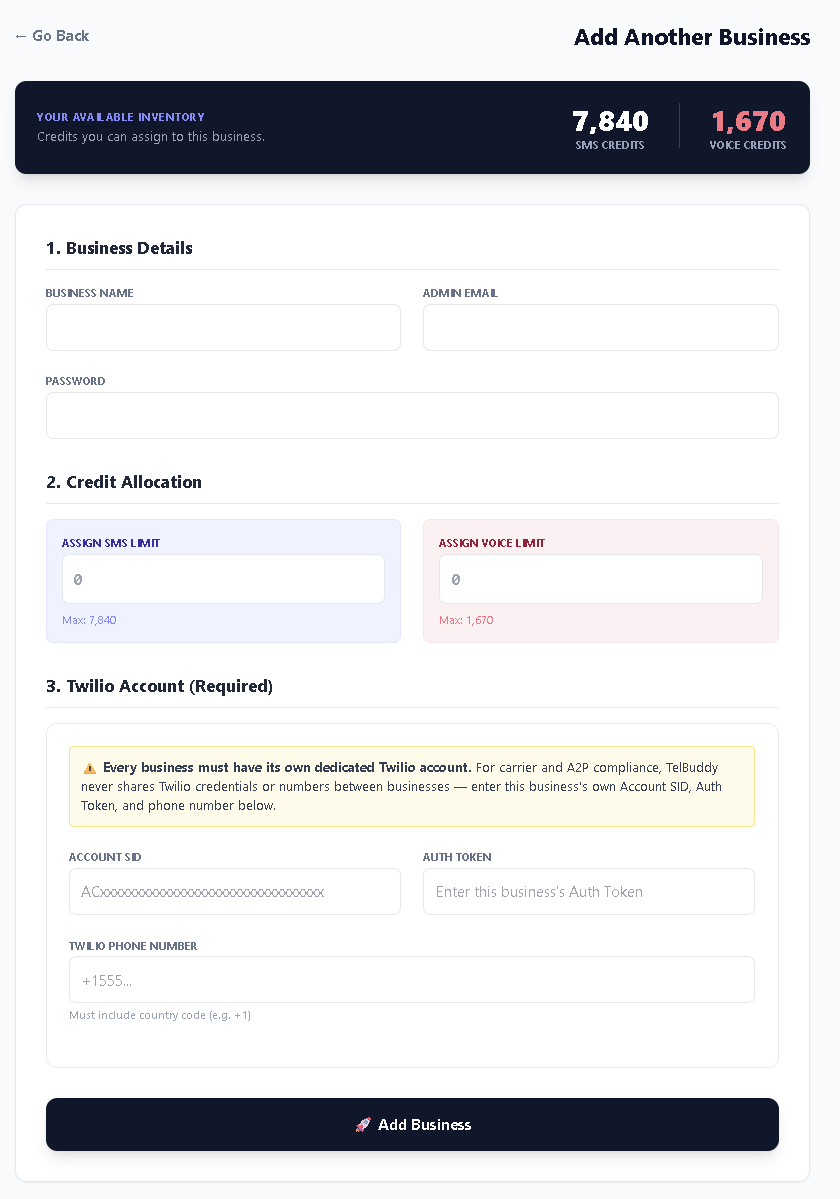
Adding another business: its own name, login, and required unique Twilio account.
Still have a question?
Check the FAQ, or reach out directly. We're happy to help.